Simple Crafts For Children Aged 2-3 Years
Do you have small children between two and three years old? Do you want them to improve their motor skills while having fun? In this article, we take a closer look at some simple crafts for children.
Simple crafts for children
So a small garden
Sowing such a small garden land can be a fun adventure for your children. Encourage them to use their hands.
It teaches them how to dig, and how to observe and care for plants. In addition, it teaches them to respect nature.
Make ladybugs out of toilet rolls
This simple craft requires just a little imagination and creativity. To make a ladybug, you need a toilet roll and red and black felt-tip pens.
Then all you need to show off your artistic abilities is to draw a ladybug on the roll!
Simple crafts with eggs
Eggs are perfect for crafts! For example, your baby may turn the egg into a duck.
For this you need an egg, a needle, a bowl, an orange piece of cloth, yellow acrylic paint, brush, glue, scissors and a black felt-tip pen.
- The first thing you do is blow out the egg using a needle and a bowl. You make a small hole in each short end of the egg and blow out the contents so that it ends up in the bowl.
- When it is clean and nice, paint the shell yellow. Be very careful not to break it.
- Then you draw the outline of the duck’s beak on the orange piece of cloth and cut it out.
- Draw two small stripes that mark the duck’s nose (nostrils), then glue on the beak and draw the eyes on the shell with a black felt-tip pen.
- In the same way, draw the contours of the duck’s feet on the orange piece of cloth, cut them out and glue them to the bottom of the egg.
A prince or princess crown
Another very simple craft is to make a glittering crown worthy of a noble princess or a gallant prince.
Use stiff paper and cut into a wide strip that is long enough to reach around the head of your prince or princess. Secure the ends together with tape or a stapler. Then cut beautiful tops to shape the crown.
You can give the crown the shape your child likes best and adapt it to the child’s taste. Finally, you can have your child paint their crown with glittery color and decorate it with stickers.
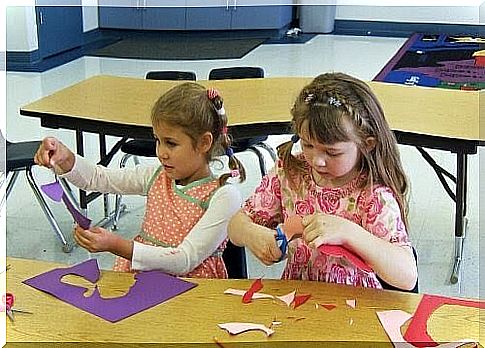
A beautiful frame in the shape of a fish
This is a good job if you want your child to learn to cut and paste. Not only does it help your child develop their motor skills and creative talents, it is also a lot of fun.
To make the frame, you need colored paper, drawing paper, scissors, crayons, glue and a photograph.
- All you need to do is draw a fish shape on the drawing paper and cut it out. Be sure to also cut out a large eye where the photo will sit.
- Cut the fish scales from the different colors of the colored paper, and use the glue to attach them to the fish.
- After pasting on the paper scales, fill in the details with colored pencils.
- Finally, put the photograph in the empty space in the eye of the fish.
Ice cream dolls
Children love to play with dolls. With this fun and educational craft, you can make animal dolls with the help of ice cream sticks. All you need are ice cream sticks, colored pieces of fabric and a little imagination.
- Paint the ice cream sticks and let them dry.
- Draw as many circles of the same size on the pieces of fabric as you have ice cream sticks. These will be used for the animals’ heads.
- All that is then left to do is to cut out the details.
- To make a monkey, you cut out the face and ears of a pink piece of cloth.
- For a lion, draw a semicircle on a brown piece of cloth, the ears on a yellow and the nose on a white. You can make a nose with a brown triangle.
- To make an elephant, draw the proboscis on a piece of gray cloth, the tip of the proboscis and the ears of a pink piece of cloth and the mouth of a red one. All that is left is to fill in some details with a black felt-tip pen.
Fold a paper flea
A paper flea is very easy to make. All you need is a piece of paper, scissors and some crayons.
- To make the flea, you need to take a square sheet of paper and fold it so that it forms a triangle.
- When you open it, you notice that the diagonal is visible where you have folded the paper.
- Repeat on the opposite side, then fold each corner down to the middle.
- Turn the flea over and repeat so that you again fold down each corner towards the middle.
- Paint each triangle in different colors and write something that the player must do on each of them. If your child is too young to read and write, he or she can draw an instruction instead.
We hope you have been inspired by these simple crafts. They are great for developing your child’s motor skills. Now just get started!